


Introduced along with the iPhone X, Animoji are animated characters, mostly animals, that are rendered from the user's facial expressions using the device's TrueDepth camera system to track the user's facial movements.
The first viral phenomenon to emerge from the launch of the iPhone X is the action known as Animoji karaoke. Purportedly kicked off by a tech journalist with early access to the smartphone, most examples of Animoji karaoke are actually examples of lip-syncing. In other words, it's like Musical.ly, if you have a face for radio.
So if you've already thrown down a grand on an iPhone X, and you want in on some of this social media fame, here's how it's done.
Select Your Song
Selecting a karaoke song is an art form unto itself. As someone who has serenaded many a bar crowd with renditions of "Living on a Prayer" by Bon Jovi, "Say It Ain't So" by Weezer, and "Mother" by Danzig, I can attest that it's best to go with a song you already know inside and out.
You also need to consider your audience. What songs bring people to their feet? In the Venn diagram of what you know and what people like, there is a happy medium.
Set Up Your Karaoke Machine
You don't need to have an actual karaoke machine to pull this off. A laptop or tablet should suffice here. If you're recording your voice, attach external speakers for a better quality backing track.
No matter how well you know the song, you'll want to have lyrics available. The simplest solution here would be to find a lyric video from YouTube to guide you along on your desktop computer. Otherwise, an app like Musixmatch (iOS | Android) can feed you lyrics over your preferred music app if you're using a separate tablet.
Record Your Performance
Animojis are accessed as a feature within the Messages app. You can select from 12 characters, but you can also change the avatar after you've recorded the clip. Apple offers its own tutorial in the video below (starting at the 2:42 mark).
Once you've recorded the Animoji, you need to save it. If you're recording through Messages, send the Animoji to yourself. Select the Animoji in that lonely conversation, tap the share button, and select "Save Video" to save it to your Photos app. Alternately, you can 3D Touch the video to pull up the options menu, and tap "Save."
However, Messages limits your video clips to 10 seconds. But there's a workaround for longer clips via the screen recording function that comes standard with iOS 11.
The screen recording button is in the Control Center, which is accessed by swiping down from the top right on the iPhone X. It's the solid-dot-within-a-circle icon. If you don't see one, you'll have to add it first from the Control Center's settings.
Once you've pressed the record button, it will countdown to the start of the recording. Swipe up to dismiss the Control Center, and continue with your Animoji performance.
When you're done, tap the red time clock icon in the left of the status bar, then choose "Stop" on the prompt. Alternatively, you can hit the screen recording icon in the Control Center again and it will stop automatically. You can also click the side button (aka the power button) to stop recording automatically, but you'll end up on the lock screen. Either way, you will receive a notification on the that the recording has saved to your Photos app.
If you have more than one singer on your song, you can repeat the recording process for each additional voice. Choose a different face for each performer to add some variety. To impress the denizens of social media, you're going to want to nail the performance. Luckily, in Animoji karaoke, you're not performing live. Take advantage of this and record multiple takes to make sure you get the best results.
Edit Your Footage
Once you have the footage you need, transfer the video files to your movie editing device (iPad, Mac, etc.). If you're working in an all-Apple ecosystem, you can shoot the video files over with AirDrop, assuming you're not already using iCloud to sync files between devices.
For our purposes, I've found that even the iPad version of iMovie is powerful enough to edit together video and music. Begin with a new movie project, after which you'll be asked to select the video clips that you want to include. Select the clips you need for a solo or lead performer, then select "Create Movie." This will place the videos on timeline where you can rearrange the clips and add transitions.
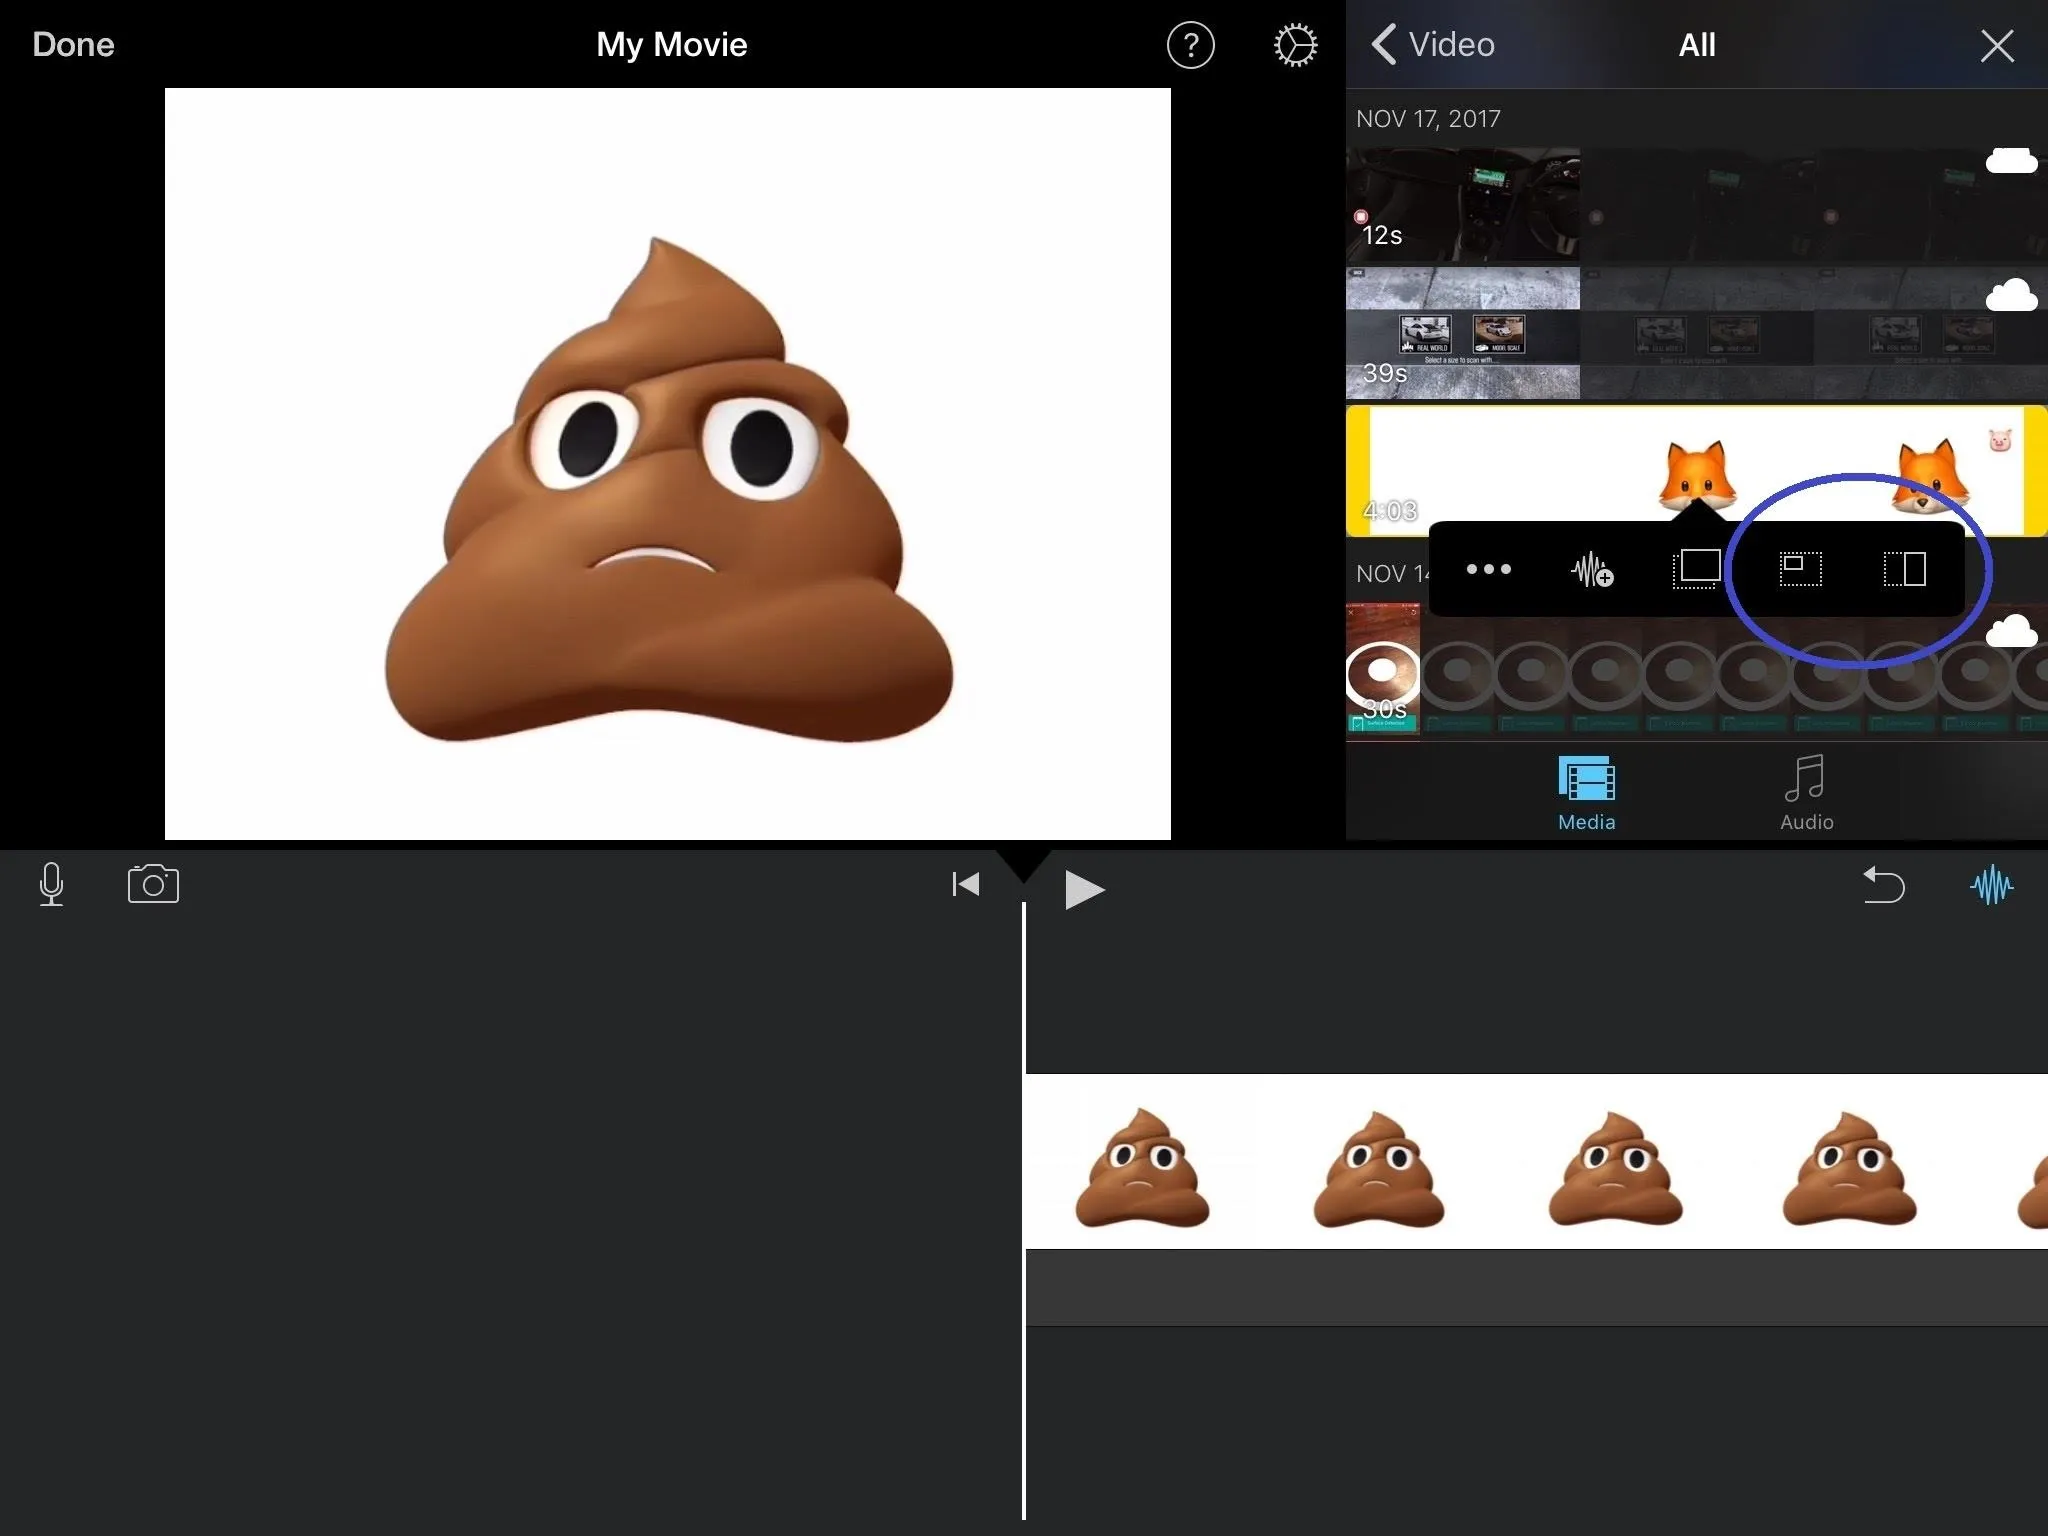
If you're using multiple singers, you'll need to add the secondary clips as overlays to the main performer. Select a clip from the Media selection window to the right, then tap the overflow menu option to find the overlay option to run the videos simultaneously, as shown below. For a duet, use split-screen. To introduce a background singer during the chorus, use the picture-in-picture option and adjust the clip in the timeline so it appears at the right time. (I'll cover performances with more than two performers at the end of this step.)
Tommy Palladino/Next Reality
If you're taking the lip-syncing approach, you need to mute the audio by tapping each video then selecting the volume option in the menu below and reducing the slider to zero. Then, add the original music from the Media selection window to the right. If you don't already have the song, you can purchase it from iTunes then download it to the device to make it available in iMovie.
Continue to adjust the clips and audio on the timeline, using the play button to preview the video. Once you've assembled everything to your liking, tap "Done." This will bring you to the main screen for your project. Tap the "Share" button and then "Save Video" to export your video.
If you have a quartet, such as the "Bohemian Rhapsody" example, start with two performers, overlay them with the vertical stack option, then export the results. Repeat this process with the next two performers, then import both combined clips into another project, this time using the side-by-side overlay. Then, proceed to add the audio track and export the video.
Publish & Post Your Masterpiece
With the video exported, you can publish the video by uploading it to the service of your choice.
If social media fame is what you crave, opt for Twitter or Instagram, where you can just share the video file directly. Select your hashtags (like #animojikaraoke) wisely. Post your video and watch the likes and retweets roll in!
Now, you're ready for your virtual close-up. In closing, here's Metallica and Billy Eichner for inspiration.
- Follow Next Reality on Facebook, Twitter, and YouTube
- Sign up for our new Next Reality newsletter
- Follow WonderHowTo on Facebook, Twitter, Pinterest, and Google+
Cover image via JugglingCowz/YouTube


Comments
Be the first, drop a comment!